CR-410C Coffee Index Colorimeter
Click Here to Watch Video
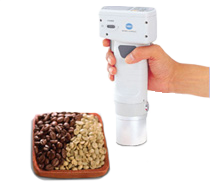
The CR-410C coffee colorimeter measures the color of coffee easily and accurately. It can perform these measurements on a wide variety of coffee: whole green beans, roasted beans, and roasted coffee.
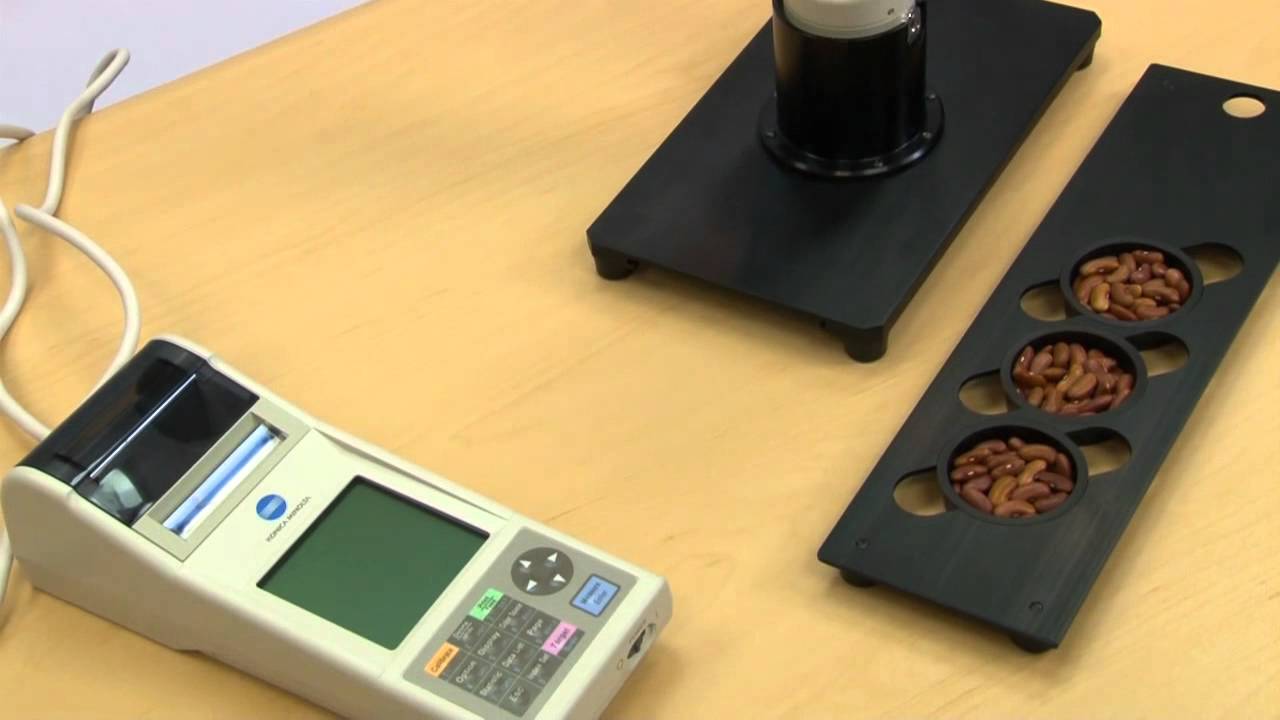
A The colorimeter is used to measure coffee bean color so that you don’t have to use a bulky and expensive instrument. It also is more accurate than trying to assess coffee bean color visually. The CR-410C is an affordable and portable option. The CR-410C uses the SCAA specialty coffee index to calculate the color, roasted level (light, medium, medium-dark, dark), the difference from a standard, and pass/fail information. Additionally, it includes our Food Color Indexing Technology (FCIT).
The CR-410C is capable of measuring whole bean, lyophilized, powder and instant coffee forms. This user-friendly instrument also boasts a much lower cost for maintenance than its competitors.
Existing Customer?
If you're looking for service support or help with calibration then complete a service request form and we'll get right back to you
Features
- Easy to use with one button calculation provides information without the hassle of printing
- Agronomical design with provides maximum portability
- Calculated measurements based coffee industry standard established by the Specialty Coffee Association of America (SCAA)
- Can measure powder, instant, whole coffee beans, and lyophilized forms
- Low-cost compared to the competition
Specifications
| Model | CR-410 Head |
|---|---|
| Name | Chroma Meters Measuring Head |
| Illuminating/viewing system | Wide-area illumination/0° viewing angle; specular component included) |
| Detector | Silicon photocells (6) |
| Display range | Y: 0.01% to 160.00% (reflectance) |
| Light source | Pulsed xenon lamp |
| Measurement time | 1 sec. |
| Minimum measurement interval | 3 sec. |
| Battery performance | Approx. 800 measurements (when using batteries under Konica Minolta’s testing conditions) |
| Measurement/illumination area | ⌀ 50mm/ ⌀ 53mm |
| Repeatability | Within ΔE*ab 0.07 standard deviation (when the white calibration plate is measured 30 times at intervals of 10 seconds) |
| Inter-instrument agreement | ΔE*ab: Within 0.8 Average of 12 BCRA Series II colors |
| Observer | 2° Closely matches CIE 1931 Standard Observer ( x2λ, yλ, zλ) |
| Illuminant *1 | C, D65 |
| Display *1 | Chroma values, color difference values, PASS/WARN/FAIL display |
| Tolerance judgement *1 | Color difference tolerance (box tolerance and elliptical tolerance) |
| Color space/ colorimetric data | XYZ, Y x y, L*a*b*, Hunter Lab, L*C*h, Munsell (only illuminant C), CMC (l:c), CIE1994, Lab99, LCh99, CIE2000, CIE WI-Tw (only illuminant D65), WI ASTM E313 (only illuminant C), YI ASTM D1925 (only illuminant C), YI ASTM E313 (only illuminant C), User index (up to six can be registered from computer) |
| Languages *1 | Operating keys: English LCD: English (default) (LCD: German, French, Italian, Spanish, Japanese) |
| Storable data sets | 1000 (measureing head and data processor save different data) |
| Color difference target colors | 100 |
| Calibration channels *1 | 20 channels (ch00: white calibration, ch01 to ch19 : user calibration) |
| Display | Dot-matrix LCD with back light (15 chars x 9 lines + 1 line for icon display) |
| Interface | RS0232C compliant (for data processor/PC) *Baud rate: 4800, 9600, 19200 (bps) set at 9600 bps when shipped from factory |
| Power source | 4 AA size alkaline or Ni-MH batteries, AC adapter AC120V 50-60Hz (for N.America and Japan) AC230V 50-60Hz (for worldwide except N.America) |
| Size | 410: 102 (W) x 244 (H) x 63 (D) mm |
| Weight | 410: Approx 570g (including 4 AAA size batteries and not including RS-232C cable) |
| Operating temperature/Humidity Range | 0 to 40C, relative humidity 85% or less (at 35 C) with no condensation * Operating temperature/humidity range of products for North America : 5 to 40 C, relative humidity 80% or less (at 31 C) with no condensation |
| Storage temperature/humidity range | -20 to 40 C, relative humidity 85% or less (at 35 C) with no condensation |
| Other | LCD back light ON/OFF function (when ON< back light stays ON for 30 seconds after last key or measuremment operation) |
| *1 indicates when connected to the Data Processor or when not set using the Data Processor or the optional software, that some of the function are not available when the measuring head is not connected. | |
| Name | Data Processor |
| Model | DP-400 |
| Display range | Y : 0.01 to 160.00% (reflectance) |
| Measurement time *2 | 1 Seconds. |
| Minimum measurement interval *2 | 3 Seconds. |
| Battery performance | Approx. 800 measurements (when using batteries under company testing Konica Minolta’s conditions) |
| Illuminants | C, D65 |
| Display | Chroma values, color difference values, color difference graphs, PASS/WARN/FAIL display |
| Tolerance judgment *2 | Color difference tolerance (box tolerance and elliptical tolerance) Only for the display function |
| Color space/ colorimetric data | XYZ, Y x y, L*a*b*, Hunter Lab, L*C*h, Munsell (only illuminant C), CMC (l:c), CIE1994, Lab99, LCh99, CIE2000, CIE WI-Tw (only illuminant D65), WI ASTM E313 (only illuminant C), YI ASTM D1925 (only illuminant C), YI ASTM E313 (only illuminant C), User index (up to six registered in the Measuring Head can be used) |
| Languages | Operating keys : English, LCD : English (default), German, French, Italian, Spanish, Japanese |
| Storable data sets | Max. 2000 pieces of data (divisible into 100 pages) Deletion and Undoing selected stored data (one piece of data or all data) are possible |
| Color difference target colors *2 | Only for the operating function (100 pieces of data when the measuring head is connected; input of measurement values or numeric) (independent of page function) |
| Calibration channels *2 | Only for the operating function (20 channels when the measuring head is connected) (ch00: white calibration; ch01 to ch19: user calibration) |
| Page function | 100 pages |
| Display | Dot-matrix LCD with back light (16 chars x 9 lines + 1 line for icon display) Contrast adjustment |
| Printer | 384 dot line thermal printer (can also print graphs) Automatically prints out all measurement results (can be set not to print) |
| Statistical function | Maximum, minimum, average, and standard deviation |
| Automatic measurement *2 | Date and time display: year, month, day, hour, minute Timer: 3seconds. to 99 minutes. (Some measurement modes require more than 3 seconds.) |
| Interface | RS-232C compliant Baud rate (bps) : 19200 fixed (when connected to PC) When measuring head is connected baud rate is automatically set to that of the measurement head |
| Power source | 4 AA size alkaline or Ni-MH batteries, AC adapter AC120V 50-60Hz (for N.America and Japan) AC230V 50-60Hz (for worldwide except N.America) |
| Size | 100(W) x 73(H) x 255(D)mm |
| Weight | Approx. 600g (not including batteries and paper) |
| Operating temperature/Humidity Range | 0 to 40C, relative humidity 85% or less (at 35 C) with no condensation * Operating temperature/humidity range of products for North America : 5 to 40 C, relative humidity 80% or less (at 31 C) with no condensation |
| Storage temperature/humidity range | -20 to 40 C, relative humidity 85% or less (at 35 C) with no condensation |
| Other User | calibration function (multi-calibration/manual calibration) ∗2, Measurements for automatic average function, Print ON/OFF function. CR-400 measurement data import function ∗2, All color space print ON/OFF function, Data protection ON/OFF function. Back light ON/OFF function. Buzzer ON/OFF function. Display color limit function, Remote mode (stored data output), Character input function (alphanumeric) |
| *2 indicates that part of or all functions are not available when the measurement head is not connected | |
