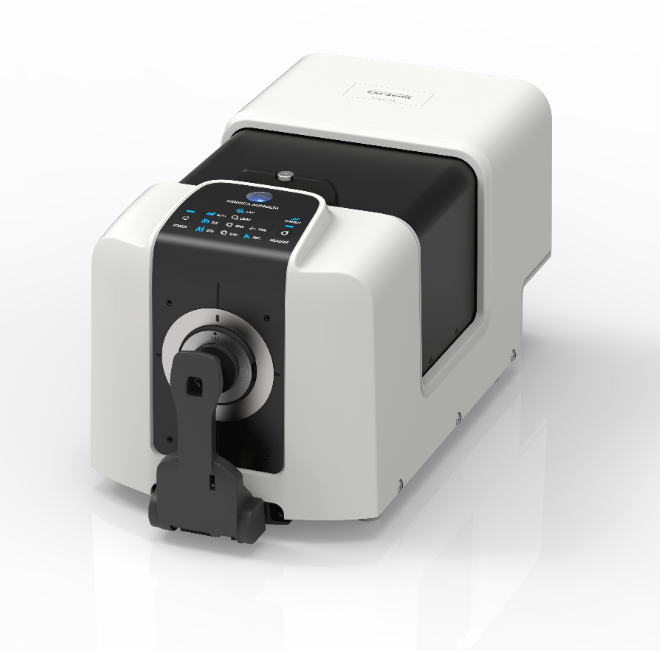
Spectrophotometer CM-36d
The Spectrophotometer CM-36d is a benchtop spectrophotometer for reflectance color measurement with advanced functions that provide cost-effective solutions to today’s measurement needs. This model is well-suited for a wide range of applications in various industries such as plastics, paints, ceramics, chemicals, etc.
With an inter-instrument agreement (IIA) of ΔE*ab< 0.15 and repeatability of σ∆E*ab < 0.03, the CM-36d can assure the measurement data communicated within the supply chain is very consistent. The CM-36d is designed with enhanced usability. The instrument comes with a flat-back design that allows its orientation to be repositioned to take measurements vertically (top-port concept). The front plate of the CM-36d comes with four screw holes that enable easy installation of custom adapters/sample holders. It also has three different aperture sizes (Ø 4.0 mm, 8.0 mm, and 25.4 mm) for different measurement needs.
With an easy-to-read status panel including a measuring button, the CM-36d can display the measurement status and condition settings at a glance, reduces operator error and improves work efficiency. Accurate positioning of the measurement sample is made easy with its sample viewing function that utilizes an integrated camera to provide a clear preview of the sample.
The CM-36d offers stable and reliable measurement data over time through its optional WAA (Wavelength Analysis & Adjustment), an innovative function that analyzes and adjusts for any wavelength shift during each calibration.
Existing Customer?
If you're looking for service support or help with calibration then complete a service request form and we'll get right back to you
Features
- High Inter-Instrument Agreement (IIA) of ΔE*ab< 0.15 (LAV/SCI; Average of 12 BCRA series II color Tiles)
- Wavelength Analysis & Adjustment (WAA) function1.
- Status panel that displays all settings and conditions of the instrument.
- 3 different measurement area:
- LAV ø25.4 mm
- MAV ø8 mm
- SAV ø4 mm
- Sample viewer function2.
- New instrument design with enhanced usability.
- Four screw holes on the front plate for installation of customized adapter/sample holders.
- “Flat back” design that allows the instrument to be used as a “top-port” instrument.
1Service contract required to have this feature activated.
2Konica Minolta SpectraMagic NX software Ver. 3.2 or later required.
Efficient sample presentation
Four screw threads and linear guidelines in the front plate enable the operator to create custom jigs to accurately position samples, maximizing the measurement process’s repeatability and speed.
Camera previewer for accurate sample positioning
The integrated camera viewer provides a clear preview of the sample for precise targeting and controls the measurement area. The software can capture images of the measurement area to provide detailed and concise reporting.
Reflectance measurements, horizontal or top-port
The Spectrophotometer CM-36d can measure solid samples in reflectance mode, horizontally or in a vertical standing position; this offers great flexibility for measuring various samples ranging from opaque to translucent and transparent.
Easy to read LED indicator panel with measurement button
The LED indicator panel displays current measurement settings at a glance. In addition, the measurement button in the panel allows measuring samples remotely.
Measurement Areas to match your samples
The Spectrophotometer CM-36d offers three different apertures with Ø 4.0, 8.0, and 25.4 mm to provide a suitable measurement size for any sample.
Optional “Wavelength Analysis & Adjustment” – (WAA)
“Analyze – Adjust – Activate” – Konica Minolta’s patented technology checks and adjusts possible wavelength shift during each instrument calibration. This procedure assures unsurpassed long-term measurement stability and can keep measurements stable even for changes in temperature or environmental conditions over time.
WAA allows the operator to distinguish whether the instrument itself is the cause of measurement differences, reducing troubleshooting time and providing improved certainty within supply chains.
Specifications
| Color | Illumination/ Viewing System | Reflectance:
di:8°, de:8° (diffused illumination, 8° viewing), SCI (Specular Component Included) / SCE (Specular Component Excluded) switchable. Conforms to CIE No.15, lSO7724/1, ASTM E1164, DIN 5033 Teil7, and JIS Z 8722 condition c standards |
| Integrating Sphere Size | Ø152 mm (6 inches) | |
| Detector | Dual 40-element silicon photodiode arrays | |
| Spectral Separation Device | Diffraction grating | |
| Wavelength Range | 360 to 740 nm | |
| Wavelength Pitch | 10 nm | |
| Half Bandwidth | approx. 10 nm | |
| Reflectance
Range |
0 to 200% | |
| Resolution: 0.01% | ||
| Light Source | 1 Pulsed xenon lamps | |
| Illumination / Measurement Area | LAV: Ø30.0 mm / Ø25.4 mm
MAV: Ø11.0 mm / Ø8.0 mm SAV: Ø7.0 mm / Ø4.0 mm |
|
| Repeatability | Colorimetric values: Standard deviation within ΔE*ab 0.03
Spectral reflectance: Standard deviation within 0.1% (When a white calibration plate is measured 30 times at 10-second intervals after white calibration) |
|
| Inter-Instrument Agreement | Within ΔE*ab 0.15
(Based on average for 12 BCRA Series II color tiles; LAV/SCI. Compared to values measured with master body under Konica Minolta standard measurement conditions) |
|
| Measurement Time | Approx. 3.5 second (SCI+SCE measurement) | |
| Minimum Interval Between Measurements | Approx. 4 second (SCI+SCE measurement) | |
| Sample Viewer Function | Using internal camera
(Image viewable/copiable using optional software such as SpectraMagic NX software Ver. 3.2 or later) |
|
| Internal Performance Check*2 | WAA (Wavelength Analysis & Adjustment) Technology | |
| Interface | USB 2.0 | |
| Target Mask Auto Detection | Yes | |
| Power | Dedicated AC adapter | |
| Operating temperature / humidity range | 13 to 33°C, Relative humidity: 80% or less (at 35°C) with no condensation | |
| Storage temperature / humidity range | 0 to 40°C, Relative humidity: 80% or less (at 35°C) with no condensation | |
| Size (W x H x D) | Approx. 248 x 250 x 498 mm | |
| Weight | Approx. 8.3 kg | |

