Spectrophotometer CM-3700A Plus
Click to Enlarge Thumbnails
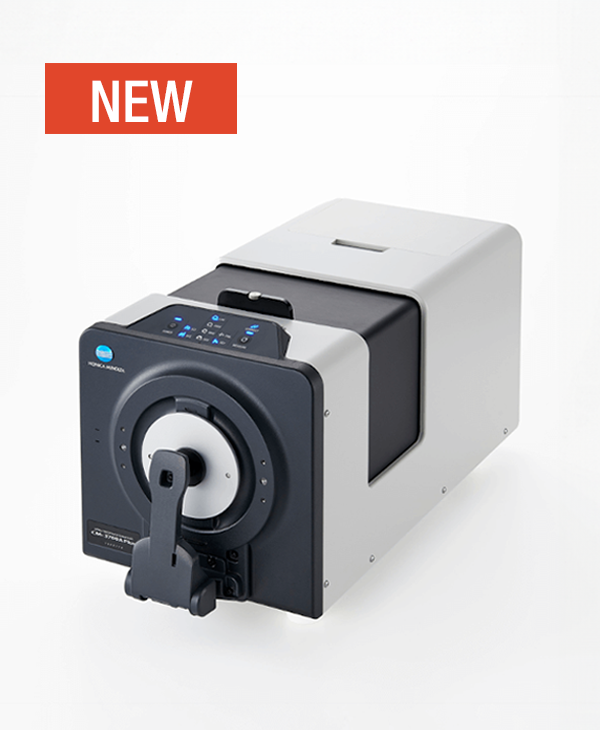
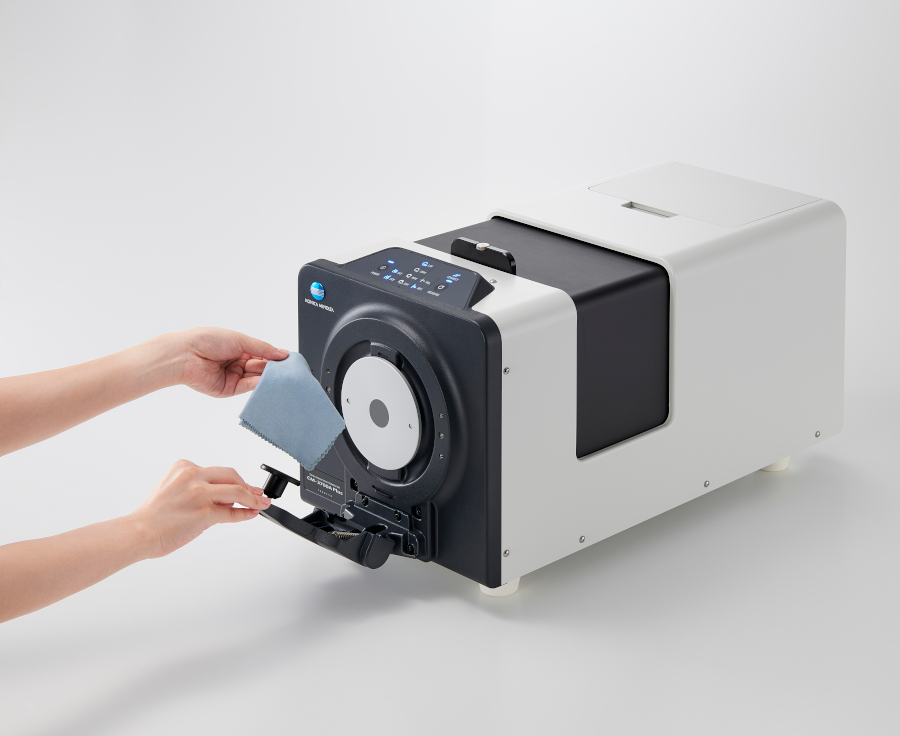
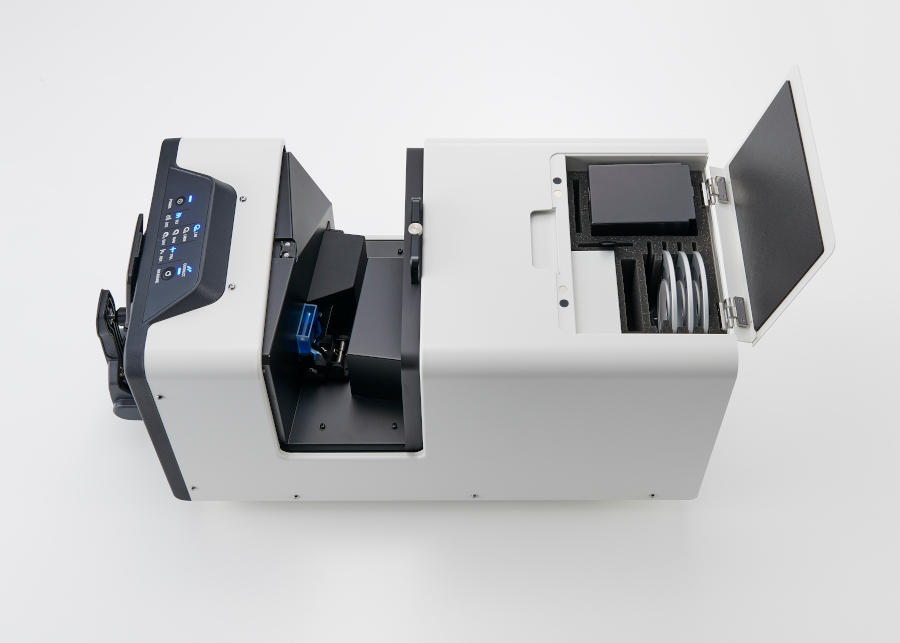
Expanding on the performance and reliability of its predecessor, the benchtop Spectrophotometer CM-3700A Plus is an advanced measurement instrument designed to precisely evaluate the color and appearance of opaque, transparent, translucent, and fluorescent samples. The CM-3700A Plus has achieved a high inter-instrument agreement of ΔE*ab 0.08 or less. This enables more precise color management of multiple units and locations in the supply chain. The CM-3700A Plus has a 50% reduction in measurement time, and simultaneous measurement of SCI/SCE streamlining the operational process giving you greater efficiency. The main body also has space to store accessories such as white calibration plate, zero calibration box, target mask, etc. When used with the optional SpectraMagic NX2 software the camera viewfinder feature allows you to view the sample directly on your computer screen to ensure precise positioning. This feature also allows images to be saved with corresponding measurement data for more accurate management of data. The optional Wavelength Analysis & Adjustment or WAA, a Konica Minolta Sensing innovation, compensates for slight shifts in measurement values due to external factors.
Its advanced capabilities and unwavering performance enable users to formulate and match color quality standards more efficiently, maintain consistency in each batch of material, and help communicate color seamlessly internally and throughout the supply chain. All this makes the CM-3700A Plus ideal for color analysis, formulation, and quality control inspections within laboratory and manufacturing environments. The benchtop Spectrophotometer CM-3700A Plus is compatible with SpectraMagic NX2 software to record measurements and provide a more comprehensive color analysis, as well as others software to formulate color recipes for various applications and share real-time measurement data.
Find out more in the Spectrophotometer CM-3700A Plus blog.
Existing Customer?
If you're looking for service support or help with calibration then complete a service request form and we'll get right back to you
Features
- Eligible ISO 17025 Certification
- The camera viewfinder function lets you see the view of the sample from the computer screen for accurate positioning
- Improved transmittance specimen chamber and accessory storage space
- Includes aperture sizes of 3x5mm, 8mm, 16mm, and 25.4mm to accurately evaluate the color of a wide variety of samples small to large; automatically detects aperture size and communicates to color analysis software, SpectraMagic NX2, for improved user convenience
- Measures opaque, transparent, translucent, and fluorescent samples light to dark in color and low to high in saturation
- Tight inter-instrument agreement of ΔE*ab 0.08, allowing color values and specifications to be communicated, shared, and coordinated seamlessly throughout the supply chain
- Can switch between SCE and SCI measurement modes to accommodate the surface conditions of each sample
- Hand assembled with quality parts, making it durable and reliable to keep customer operations running as smooth as possible
- USB connection conveniently allows users to connect to a PC or laptop
- Conforms to standards CIE, ISO, ASTM, DIN, and JIS measurement requirements
- Integrates with SpectraMagic NX2 software for color quality control, as well as others software for color formulation
Specifications
| Illuination/ viewing system | Reflectance | di:8°, de:8° (diffuse illumination/8° viewing angle) |
| SCI (specular component included)/SCE (specular component excluded) switchable & simultaneously | ||
| Conforms to CIE No.15(2004), ISO 7724/1, ASTM E 1164, DIN
5033 Teil 7 and JIS Z 8722 condition c standard. |
||
| Transmittance | di:0°, de:0° (diffuse illumination/0° viewing angle) | |
| Conforms to CIE No.15(2004), ASTM E 1164, DIN 5033 Teil 7 and JIS Z 8722 condition g standard. | ||
| Integrating sphere size | ø152 mm/6 inches | |
| Detector | 38-element silicon photodiode array | |
| Spectral separation device | Diffraction grating | |
| Wavelength range | 360 to 740 nm | |
| Wavelength pitch | 10 nm | |
| Meia Banda | Aprox. 14 nm average | |
| Measuring range | 0 to 200%; Resolution: 0.001% | |
| Light source | Pulsed xenon arc lamp | |
| Measurement/ illumination area | Reflectance | Changeable between SAV, MAV, LMAV and LAV
SAV : 3×5 mm measurement / 5×7 mm illumination MAV : ø8 mm measurement/ ø11 mm illumination LMAV : ø16 mm measurement / ø20 mm illumination LAV : ø25.4 mm measurement / ø28 mm illumination |
| Transmittance | Aprox. Ø20 mm / ø25 mm | |
| Repeatability | White | Colorimetric values : Standard deviation within ΔE ab 0.005 Spectral reflectance : Standard deviation within 0.05% (When a white calibration plate is measured 30 times at
10-second intervals after white calibration) |
| Black | Colorimetric values : Standard deviation within AE ab 0.02 Spectral reflectance : Standard deviation within 0.02% (When a black tile (BCRA Serles II; reflectance: 1%) is measured 30 times at 10-second intervals after white calibration) | |
| Inter-instrument agreement | Within ΔE*ab 0.08
(Based on average for 12 BCRA Series II color tiles; LAV/SCI. Compared to values measured with a master body under Konica Minolta standard measurement conditions) |
|
| UV adjustment | UV setting : UV cutoff filter : 400 nm
Computer controlled: continuously variable, 0.0%~100.0% (1000step) |
|
| Sample temperature measurement | Accuracy (Within operating temperature/humidity range) SAV : ±1.2°C
LMAV, MAV : ±0.8°C LAV : ±0.5°C |
|
| Tempo de medição | SCI or SCE : Approx. 2 s SCI or SCE with measuring sample temparature : Approx. 4.5 s SCI+SCE : Approx. 5 s SCI+SCE with measuring sample temparature : Approx. 5 s Transmittance : Approx. 2 s | |
| Minimum interval between measurements | SCI or SCE : Approx. 3 s SCI or SCE with measuring sample temparature : Approx. 5 s SCI+SCE : Approx. 6 s SCI+SCE with measuring sample temparature : Approx. 6 s Transmittance : Approx. 3 s | |
| Transmittance chamber | Maximum sample thickness : Approx. 50 mm Maximum sample length : Unlimited (no sides when transmittance chamber cover is open) Sample holder (optional) for holding sheet samples or containers of liquid samples can be installed/removed | |
| Camera viewfinder function | Using internal camera.
* Image viewable/copiable using optional software such as SpectraMagic NX2 |
|
| Internal Performance Check*1 | WAA (Wavelength Analysis & Adjustment) Technology | |
| Ambient temperature sensor | Yes | |
| Interface | USB2.0 | |
| Power | Dedicated AC adapter | |
| Size (HxWxD) | Aprox. 307(H) x 271(W) x 600(D)mm | |
| Peso | Aprox. 20.0kg | |
| Operating temperature/ humidity range | Temperature: 13 to 33°C,
Relative humidity: 80% or less (at 33°C) with no condensation |
|
| Storage temperature/humidity range | Temperature: 0 to 40°C,
Relative humidity: 80% or less (at 35°C) with no condensation |
|
| Standard Accessories | White Calibration Plate; Target Masks (SAV,MAV,LMAV,LAV); Zero Calibration Box; USB Cable (3 m); AC Adapter | |
| Optional Accessories | Color Data Software SpectraMagic NX2; Transmittance Specimen Holder; Cells (Glass; 2 mm, 10 mm, 20 mm); Plastic Cells (2 mm, 10 mm, 20 mm); Transmittance Zero Calibration Plate; Color Plates; Green tile; Dust Cover | |
*1 The WAA function enables wavelength diagnosis and wavelength correction of the instrument. This function is available free of charge for the first year after purchase, and can be continued after the second year by having the instrument serviced and calibrated.


